An exterior inspection helps you understand the condition of a property before small issues become larger repairs. For property managers, field service providers, and maintenance vendors, it also creates a record of damage, occupancy clues, safety concerns, and repair needs.
The exterior of a home protects everything inside it. Roof damage, poor drainage, broken siding, unsafe stairs, or missing handrails can lead to water intrusion, tenant complaints, safety risks, and higher repair costs.
This guide explains what to check during a residential exterior inspection, how to document findings, and when to escalate issues to a licensed specialist.
Table of Contents
What Is an Exterior Inspection?
An exterior inspection is a visual review of the outside areas of a residential property. It usually covers the roof, gutters, siding, windows, doors, foundation, grading, walkways, stairs, decks, railings, exterior lighting, and other visible exterior components.
In professional home inspection standards, inspections are generally visual and limited to accessible areas. InterNACHI defines a home inspection as a non-invasive visual examination of accessible areas of a residential property, based on the conditions observed on the inspection date. It also states that an inspection does not reveal every issue, only observed material defects within the inspection scope.
That distinction matters. A field exterior inspection can help identify visible warning signs, but it does not replace a licensed home inspection, engineering review, roof inspection, electrical evaluation, pest inspection, or code inspection when those are needed.
Why Exterior Inspections Matter
Exterior inspections help protect residential properties from water damage, safety problems, and deferred maintenance. They are especially useful for vacant properties, rental homes, REO assets, and managed portfolios.
For property managers, exterior inspections help you spot issues before tenants report them. For field service providers, they help document occupancy, visible damage, access issues, and maintenance needs.
HUD’s NSPIRE inspection model also shows why exterior conditions matter. HUD separates inspections into three areas: Unit, Inside, and Outside. HUD defines “Outside” as the building site, exterior components, and building systems located outside the building or unit, including items such as sidewalks and air-conditioning units.
Even if a property is not HUD-assisted, this framework is useful. It reminds us that the outside of the property is part of habitability, safety, and long-term asset protection.
When to Perform an Exterior Inspection
Exterior inspections should happen on a regular schedule, not only after visible damage appears.
For residential properties, useful inspection times include before move-in, after move-out, during routine property visits, after severe weather, before seasonal changes, and when a property becomes vacant.
A quick exterior inspection may be enough for a routine check. A more detailed inspection may be needed after storms, tenant turnover, vandalism, roof leaks, or long vacancy periods.
For managed portfolios, a recurring inspection schedule helps you catch repeat problems across properties. It also makes owner reporting and maintenance planning much easier.
What an Exterior Inspection Should Cover
Professional inspection standards give a helpful starting point. InterNACHI’s exterior standards include exterior wall coverings, eaves, soffits, fascia, windows, exterior doors, flashing, trim, adjacent walkways and driveways, stairs, porches, decks, balconies, railings, vegetation, surface drainage, retaining walls, and grading where they may affect the structure through moisture intrusion.
For field service work, you may also need to document occupancy indicators, property access, utilities, visible damage, safety hazards, and required photos.
Below is a practical exterior inspection checklist for residential properties.
Residential Exterior Inspection Checklist
1. Property Access and Occupancy Clues
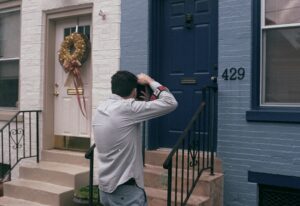
Start by confirming that you are at the correct property. Take a clear address photo if your work order requires one.
Look for signs that the property may be occupied, vacant, or abandoned. Occupancy clues may include vehicles, personal items, active utilities, maintained landscaping, trash bins, lights, pets, window coverings, or visible furniture.
Vacancy clues may include overgrown grass, piled mail, posted notices, disconnected meters, broken windows, unsecured doors, no window coverings, or no visible personal property.
Do not rely on one sign alone. Report what you see and avoid guessing.
Example:
“Property appears vacant. No vehicles present, grass overgrown, no window coverings visible, and notices posted on front door.”
If occupancy status is unclear, say that clearly in the report.
2. Required Exterior Photos
Photo documentation is one of the most important parts of an exterior inspection.
At a minimum, take photos of the front, rear, left side, right side, street scene, address, and any visible damage. For vacant properties, you may also need photos of access points, utilities, roof views, garage, outbuildings, and vacancy indicators.
Use wide photos for context and close-up photos for detail. A close-up of damaged siding is useful, but the client also needs a wider photo showing where that siding is located.
A good photo set should answer three questions: what is the issue, where is it located, and how serious does it appear?
3. Roof Inspection From the Ground
Inspect the roof from the ground when possible. Do not climb onto a roof unless you are trained, insured, authorized, and conditions are safe.
InterNACHI’s roof standard says inspectors should inspect roof-covering materials, gutters, downspouts, vents, flashing, skylights, chimneys, and roof penetrations from ground level or the eaves. The same standard says inspectors are not required to walk on any roof surface.
Look for missing shingles, curled shingles, sliding shingles, damaged flashing, sagging areas, debris, holes, visible leaks, damaged vents, and storm damage.
Also check gutters and downspouts. Loose gutters, clogged gutters, missing downspouts, and poor discharge can send water toward the foundation.
If you see roof damage, document it clearly and recommend review by a qualified roofing professional.
4. Chimneys, Flashing, and Roof Penetrations
Chimneys and roof penetrations are common water-entry points. From the ground, look for missing mortar, leaning masonry, cracked crowns, damaged caps, rusted flashing, gaps, stains, or loose materials.
You may not be able to see every detail from the ground. That is normal. If you see stains, missing materials, or damage near a chimney or roof penetration, recommend a closer professional review.
Do not state that flashing is leaking unless you can confirm it. Report the visible condition instead.
Example:
“Visible staining below chimney area. Recommend roofing or chimney specialist evaluation.”
5. Siding and Exterior Wall Coverings
Inspect siding, stucco, brick, stone, wood, vinyl, fiber cement, and other wall coverings. Look for cracks, holes, loose sections, rot, warping, impact damage, missing pieces, stains, and gaps.
Pay close attention to areas below windows, around doors, near decks, and close to the ground. These locations often show early moisture damage.
Wood siding and trim can rot where paint fails or water sits against the surface. Vinyl siding can crack or loosen. Stucco can show cracks, bulging, or staining. Brick can show mortar deterioration or movement.
Document the material type if possible. This helps the client understand repair options.
6. Eaves, Soffits, Fascia, and Trim
Eaves, soffits, fascia, and trim protect roof edges and help control moisture and ventilation.
Look for peeling paint, rot, missing sections, pest openings, sagging areas, water stains, and loose boards. Also check for blocked soffit vents where visible.
Damaged fascia can affect gutter attachment. Damaged soffits can allow pests into attic areas. These are not just cosmetic issues.
Take both wide and close-up photos. If damage appears widespread, recommend further evaluation.
7. Windows and Exterior Doors
Inspect exterior doors and a representative number of windows. InterNACHI’s standards include a representative number of windows and all exterior doors in the exterior inspection scope.
Check for broken glass, cracked frames, damaged screens, missing locks, poor seals, gaps, rot, peeling paint, missing caulk, and signs of water intrusion.
Exterior doors should close, latch, and appear secure. If a door is broken, open, or unsecured, report it immediately according to the work order.
For rental and vacant properties, door and window security matters. Unsecured openings can lead to weather damage, unauthorized entry, pests, and liability concerns.
8. Foundation, Grading, and Drainage
Walk around the property and look at the visible foundation and surrounding grading. Watch for cracks, crumbling material, bowing, settlement, staining, efflorescence, and water pooling.
Surface drainage is a major part of exterior condition. Water should move away from the structure, not toward it.
Check for downspouts discharging near the foundation, soil sloping toward the property, blocked drainage paths, standing water, and erosion.
InterNACHI’s exterior standards include vegetation, surface drainage, retaining walls, and grading where those conditions may harm the structure through moisture intrusion.
If you see large cracks, movement, or repeated water intrusion, recommend evaluation by a qualified professional.
9. Walkways, Driveways, Steps, and Ramps
Inspect walkways, driveways, steps, ramps, and entry paths. Look for cracks, uneven surfaces, potholes, loose materials, missing sections, and trip hazards.
Trip hazards should be documented clearly. HUD’s NSPIRE standards include specific standards for sidewalks, walkways, ramps, steps, stairs, handrails, guardrails, and trip hazards, which shows how closely exterior access areas are tied to safety.
For residential properties, unsafe walking surfaces can create tenant complaints and liability exposure. They can also limit access for vendors, inspectors, and emergency responders.
Take photos from a walking perspective and close-up photos of the hazard.
10. Porches, Decks, Patios, Balconies, and Railings
Check porches, decks, patios, balconies, stairs, railings, guards, and handrails. Look for loose boards, rot, rust, leaning posts, missing railings, loose fasteners, sagging, cracked concrete, and unstable steps.
Do not test anything in a way that could damage the structure or put you at risk. If a deck or balcony appears unsafe, stay off it and document from a safe location.
Deck and balcony issues should be escalated quickly. Structural failure in these areas can create serious injury risk.
If railings are loose, missing, or damaged, note the location and severity.
11. Exterior Plumbing and Faucets
Check visible exterior plumbing components. This may include hose bibs, exterior faucets, visible pipes, irrigation connections, and exposed plumbing lines.
Look for leaks, broken handles, missing vacuum breakers where required, freeze damage, corrosion, and poor drainage near the wall.
Do not attempt plumbing repairs unless the work order includes that task and you are qualified. Report visible issues and recommend a licensed plumber when needed.
12. Exterior Electrical and Lighting
Check exterior lighting, visible outlets, covers, fixtures, service mast, meter area, and obvious electrical hazards.
Look for broken fixtures, missing outlet covers, exposed wiring, damaged conduit, loose equipment, scorch marks, and non-working exterior lights.
Do not open electrical panels or touch exposed wiring. Electrical work should be handled by licensed electricians.
HUD’s NSPIRE standards include exterior lighting, electrical conductor/outlet/switch standards, GFCI/AFCI standards, and electrical service panel standards across inspectable areas. This supports treating exterior electrical concerns as safety-related items, not minor cosmetic issues.
13. HVAC Exterior Equipment
Inspect visible exterior HVAC equipment, such as condenser units or heat pump units. Look for missing equipment, damaged fins, disconnected lines, rust, poor clearance, debris, unstable pads, or signs of theft.
Do not test or repair HVAC equipment unless authorized and qualified.
For vacant or REO properties, document whether the unit appears present and intact. If equipment is missing, photograph the location and report it clearly.
Example:
“Exterior condenser unit missing from right side of property. Lines visible. Recommend HVAC evaluation.”
14. Landscaping, Vegetation, and Site Conditions
Landscaping can affect drainage, pest access, visibility, and building damage. Inspect trees, shrubs, grass, vines, and debris around the property.
Look for tree limbs touching the roof, shrubs blocking windows, vines growing into siding, roots affecting walkways, and vegetation against exterior walls.
Also check for debris, trash, abandoned items, and unsafe site conditions.
Vegetation that traps moisture against the structure should be reported. It can contribute to rot, pest issues, and exterior deterioration.
15. Fences, Gates, Garages, and Outbuildings
Inspect fences, gates, detached garages, sheds, and outbuildings when they are part of the work order and safely accessible.
Check for broken gates, missing locks, leaning fences, damaged garage doors, unsecured structures, broken windows, roof damage, and signs of entry.
Some professional standards may exclude fences, outbuildings, and certain site features from a general home inspection scope. InterNACHI, for example, says inspectors are not required to inspect or operate fences, outbuildings, exterior accent lighting, and several other exterior items.
For field service work, your client may still require photos or notes for these items. Always follow the work order.
16. Pools, Spas, and Water Features
Pools, spas, and water features need extra caution. If a pool area is unsecured, report it immediately according to client instructions.
Do not enter unsafe pool areas. Do not test pool equipment unless you are authorized and qualified.
InterNACHI’s exterior standard says inspectors are not required to inspect swimming pools or spas as part of the general exterior inspection scope.
For field inspections, the main task is usually to document visible safety concerns. This may include missing fencing, unlocked gates, stagnant water, broken covers, or unsecured access.
What Is Not Included in a Basic Exterior Inspection?
A basic exterior inspection does not cover everything. It is usually a visual review of accessible areas.
It may not include hidden flashing, concealed wall damage, underground utilities, irrigation systems, wells, septic systems, pools, spas, engineering analysis, pest identification, environmental testing, roof certification, or code compliance.
InterNACHI’s general exclusions state that inspectors are not required to determine code compliance, causes of conditions, concealed defects, service life expectancy, repair costs, or the presence of pests, mold, radon, lead paint, asbestos, and other environmental hazards.
For property managers and service providers, this means your report should stay factual. Document what is visible and recommend further evaluation when needed.
Exterior Inspection Photo Standards
Good photos make inspection reports easier to approve, review, and act on.
Use this process:
- Take wide photos of each side of the property.
- Take a clear address photo.
- Take a street scene photo if required.
- Photograph access points and occupancy indicators.
- Capture all visible damage with close-ups.
- Include context photos showing where each issue is located.
- Photograph safety hazards from a safe distance.
- Note any areas you could not access.
Avoid blurry, dark, or overly close photos. If the client cannot tell what the issue is or where it is located, the photo may not be useful.
When possible, take photos in a consistent order. This makes reports easier to review across multiple properties.
How to Report Exterior Damage
Your report should be clear, factual, and specific.
A weak report says:
“Siding damaged.”
A stronger report says:
“Vinyl siding cracked on rear right corner near downspout. Approximate affected area is 2 feet by 3 feet. No active water intrusion observed from exterior. Recommend siding repair evaluation.”
Include the location, material, visible condition, estimated size, safety concern, photos, and recommended next step.
Do not guess the cause unless it is obvious and verified. For example, you can report “water staining below window,” but you should avoid saying “window flashing failure” unless a qualified specialist has confirmed it.
When to Escalate to a Licensed Specialist
Some exterior issues should not stay at the field inspection level.
Call or recommend a licensed or qualified specialist for:
- roof leaks, missing shingles, sagging roof areas, or damaged flashing
- exposed wiring, damaged exterior electrical components, or panel concerns
- active plumbing leaks or freeze-damaged exterior pipes
- structural cracks, foundation movement, bowing walls, or unsafe decks
- mold-like growth or suspected environmental hazards
- pest infestation signs
- unsafe pool or spa conditions
- major drainage or erosion issues
- HVAC condenser damage or missing equipment
If a condition appears unsafe, do not enter the area or continue the inspection there. Document from a safe location and report the concern.
Exterior Inspection Checklist Summary
Use this checklist for residential exterior inspections:
- Address and property identification
- Occupancy or vacancy indicators
- Front, rear, left, and right side photos
- Roof, gutters, downspouts, and flashing
- Chimney and roof penetrations
- Siding, trim, eaves, soffits, and fascia
- Windows and exterior doors
- Foundation, grading, and drainage
- Walkways, driveways, stairs, and ramps
- Decks, porches, patios, balconies, and railings
- Exterior plumbing and hose bibs
- Exterior electrical and lighting
- HVAC exterior equipment
- Landscaping and vegetation
- Fences, gates, garages, and outbuildings
- Pools, spas, and water features, if present
- Visible damage and safety hazards
- Access limitations
- Recommended follow-up actions
An exterior inspection is one of the most useful ways to protect a residential property. It helps you catch visible damage, document safety issues, confirm occupancy clues, and plan repairs before problems grow.
Keep the process simple and consistent. Check the same areas each time, take clear photos, report visible facts, and escalate technical issues to qualified specialists.
For property managers and field service providers, the value comes from consistency. A clear exterior inspection process helps protect residents, reduce surprises, and keep property records organized.