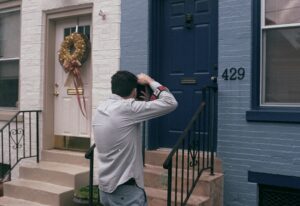
An interior inspection helps you document the condition of a home from the inside. It can reveal safety risks, water damage, missing fixtures, system concerns, and repair needs that may not be visible from the exterior.
For field service providers and property managers, an interior inspection also creates a clear record. Good notes and photos help clients understand property condition, approve repairs, and track maintenance over time.
This guide explains what to check during a residential interior inspection, how to document findings, and when to escalate issues to licensed specialists.
What Is an Interior Inspection?
An interior inspection is a visual review of the accessible inside areas of a residential property. It usually covers walls, ceilings, floors, stairs, windows, doors, kitchens, bathrooms, living areas, bedrooms, basements, attics, utility spaces, safety devices, and visible system concerns.
Professional home inspection standards treat inspections as visual and non-invasive. InterNACHI defines a home inspection as a non-invasive visual examination of accessible areas of a residential property, focused on observed material defects within the inspection scope.
That distinction matters. A field interior inspection helps document visible conditions, but it does not replace a licensed home inspection, structural evaluation, electrical inspection, plumbing inspection, HVAC inspection, pest inspection, mold assessment, or code inspection when those are needed.
Why Interior Inspections Matter
Interior inspections help catch issues before they become larger repairs. Water stains, soft flooring, damaged drywall, missing smoke detectors, and visible electrical hazards can all point to bigger problems.
For rental homes and managed properties, interior inspections also support tenant safety and owner reporting. They help separate normal wear from damage, document repair needs, and keep property records organized.
HUD’s NSPIRE model also shows why interior conditions matter. HUD divides inspectable areas into Unit, Inside, and Outside, and states that items inside buildings and units must be functionally adequate, operable, and free of health and safety hazards.
Even if a property is not HUD-assisted, this is a useful framework. Interior condition affects habitability, safety, and long-term property value.
When to Perform an Interior Inspection
Interior inspections should follow a clear schedule and proper access rules. For occupied rental properties, always follow lease terms and local notice requirements before entering.
Useful times to perform an interior inspection include move-in, move-out, routine property visits, vacancy checks, after tenant complaints, after water intrusion, after storms, and before major repairs.
Move-in inspections create a baseline. Move-out inspections help compare condition and identify damage beyond normal wear. Routine inspections help property managers catch repair needs during the lease term.
For vacant or REO properties, interior inspections help document damage, safety risks, missing items, vandalism, winterization concerns, and needed repairs.
What an Interior Inspection Should Cover
ASHI’s Standard of Practice includes an Interiors section as part of a home inspection framework, along with structural components, exterior, roofing, plumbing, electrical, heating, air conditioning, insulation, ventilation, and fireplaces.
For field service work, the scope may be different. Your client may require photos, access notes, room-by-room documentation, system observations, damage reporting, repair estimates, or bid details.
A strong interior inspection should cover:
- general room condition
- walls, ceilings, floors, doors, and windows
- kitchen and bathroom areas
- basement, attic, and utility spaces
- visible plumbing, electrical, HVAC, and appliance concerns
- smoke detectors, carbon monoxide detectors, locks, stairs, and handrails
- water damage, pest signs, odors, mold-like growth, and safety hazards
- photo documentation and repair recommendations
Use the checklist below as a practical structure.
Residential Interior Inspection Checklist
1. Access, Entry, and Safety Check
Start by confirming that you have permission to enter. Follow the work order, client instructions, lease terms, and local requirements.
Before entering, look for safety risks. Do not enter if you see signs of fire damage, structural collapse, active flooding, exposed wiring, strong gas odor, criminal activity, aggressive animals, or other hazards.
Once inside, begin with a general entry photo. Document the first visible condition before moving through the property.
If the property is unsafe, stop the inspection and report the issue.
2. Occupancy and Property Condition Clues
Interior conditions can help confirm whether a property is occupied, vacant, abandoned, or recently vacated.
Signs of occupancy may include furniture, clothing, food, toiletries, personal items, active utilities, clean living areas, or recent activity.
Signs of vacancy may include empty rooms, no personal belongings, shut-off utilities, debris, missing appliances, open windows, vandalism, or long-term neglect.
Do not guess. Report the visible evidence.
Example:
“Interior appears vacant. No furniture or personal belongings present. Kitchen appliances missing. Debris visible in living room and hallway.”
If occupancy status is unclear, say that in the report.
3. Required Interior Photos
Photo documentation should follow the client’s instructions. In most cases, take wide photos of each room before close-ups of damage.
Useful interior photos may include:
- entry area
- each room from at least one wide angle
- kitchen
- bathrooms
- bedrooms
- living areas
- basement, attic, and utility areas if accessible
- appliances
- visible systems
- damage and safety hazards
- access limitations
Wide photos show context. Close-ups show detail. Use both whenever you document damage.
Avoid blurry, dark, or overly close photos. The client should be able to understand what the issue is and where it is located.
4. Walls, Ceilings, and Trim
Inspect walls, ceilings, baseboards, crown molding, and trim. Look for cracks, holes, stains, peeling paint, impact damage, missing trim, water marks, mold-like growth, and poor repairs.
Water stains need careful documentation. They may be related to roof leaks, plumbing leaks, HVAC condensation, bathroom moisture, or past flooding.
Do not assume the cause unless it has been verified. Report the visible condition and recommend further evaluation when needed.
Example:
“Brown water stain visible on bedroom ceiling near exterior wall. No active dripping observed at inspection. Recommend leak source evaluation.”
5. Floors and Floor Coverings
Check flooring throughout the property. Look for stains, soft spots, lifting vinyl, cracked tile, damaged carpet, scratched wood, missing transition strips, uneven areas, and trip hazards.
Soft or uneven flooring can point to moisture damage, subfloor issues, or structural concerns. Document the location clearly.
For rental properties, flooring condition is also important for move-in and move-out comparisons. Take photos before and after tenant occupancy when possible.
If flooring appears unsafe, report it as a safety concern.
6. Interior Doors, Windows, and Hardware
Check interior doors, closet doors, exterior-facing doors from the inside, windows, locks, latches, and hardware.
Look for damaged doors, missing knobs, broken locks, cracked glass, stuck windows, missing screens, and signs of forced entry.
Windows and doors matter for safety, ventilation, security, and habitability. If an exterior door will not lock or a window is broken, report it as a priority issue.
For vacant properties, unsecured openings can lead to weather damage, pest intrusion, and unauthorized access.
7. Stairs, Railings, and Handrails
Inspect interior stairs, railings, guards, and handrails. Look for loose railings, missing handrails, uneven steps, damaged treads, weak supports, and trip hazards.
HUD NSPIRE includes standards for stairs, handrails, guardrails, and trip hazards, which shows how important these items are for health and safety in housing inspections.
Do not test railings aggressively. If a railing appears loose or unsafe, document it and recommend repair.
Stair and handrail issues should not be treated as cosmetic defects. They can create real safety risks.
8. Kitchen Inspection Checklist
The kitchen should be reviewed closely because it includes plumbing, appliances, electrical components, cabinets, flooring, ventilation, and surfaces that see daily use.
Check the sink, faucet, drain, garbage disposal if present, cabinets, counters, backsplash, flooring, appliances, lighting, outlets, and visible plumbing under the sink.
Look for leaks, stains, damaged cabinets, loose countertops, broken drawers, pest signs, missing appliances, and non-working fixtures.
If the inspection allows basic testing, run water long enough to check drainage and visible leaks. Do not perform repairs unless the work order allows it and you are qualified.
For appliances, document whether they are present, missing, damaged, or visibly unsafe.
9. Bathroom Inspection Checklist
Bathrooms often show early signs of moisture problems. Check toilets, sinks, tubs, showers, faucets, drains, exhaust fans, vanities, mirrors, walls, ceilings, floors, caulk, grout, and visible plumbing.
Look for active leaks, slow drains, soft flooring, loose toilets, damaged caulk, mold-like growth, water stains, broken fixtures, and poor ventilation.
Pay close attention around toilets, tubs, showers, and under sinks. Small leaks in these areas can damage subfloors, cabinets, and walls.
If you see repeated moisture damage or mold-like growth, recommend further evaluation by the right professional.
10. Bedrooms, Living Rooms, and Common Areas
Inspect bedrooms, living rooms, dining areas, hallways, and other common spaces. Look at walls, ceilings, floors, windows, doors, closets, lighting, outlets, vents, and visible damage.
Common issues include wall holes, stains, damaged flooring, broken blinds, missing fixtures, odors, pet damage, pest signs, and water stains.
For tenant-occupied properties, keep notes objective. Avoid emotional language or assumptions about how the damage happened.
A good report says what is visible, where it is located, and what should happen next.
11. Basement, Attic, and Crawl Space Access
Only inspect basements, attics, and crawl spaces if access is safe and allowed by the work order.
Look for water intrusion, exposed wiring, damaged insulation, pests, structural concerns, blocked access, ventilation issues, and stored items that prevent inspection.
Do not enter unsafe crawl spaces or attics. Limited access should be documented.
InterNACHI standards include readily accessible areas, but inspectors are not required to move items or enter unsafe areas.
If you cannot inspect an area, explain why.
12. Utility Areas and Mechanical Spaces
Utility areas often contain important systems. Inspect the visible condition of water heaters, HVAC equipment, electrical panels from the outside, shutoff areas, laundry hookups, and visible piping.
Look for leaks, rust, corrosion, missing covers, blocked access, disconnected vents, damaged ducts, and unsafe storage near equipment.
Do not open electrical panels or service mechanical systems unless you are trained, licensed, and authorized.
Mechanical rooms should remain accessible. If access is blocked, document the limitation.
13. Plumbing Observations
Interior inspections often reveal plumbing issues. Look for visible leaks, corrosion, water stains, slow drains, running toilets, loose fixtures, and damaged supply lines.
Check under sinks when accessible. Look around toilets, tubs, showers, laundry areas, and water heaters.
Major plumbing issues should go to a licensed plumber. This includes active leaks, sewer backups, broken supply lines, water heater problems, and repeated drainage issues.
Your report should describe what you see, not diagnose what you cannot confirm.
14. Electrical Observations
Look for visible electrical concerns such as missing outlet covers, broken switches, damaged fixtures, scorch marks, exposed wiring, non-working lights, and unsafe extension cord use.
Do not touch exposed wiring. Do not remove panel covers. Do not perform electrical repairs unless you are licensed and authorized.
Use licensed electricians for panel work, wiring concerns, breaker issues, overheating, and technical testing.
Electrical hazards should be documented clearly and escalated quickly.
15. HVAC, Ventilation, and Indoor Comfort
Check visible HVAC components inside the home. This may include thermostats, vents, returns, filters, air handlers, radiators, baseboard heaters, or visible ductwork.
Look for missing filters, blocked vents, damaged thermostats, poor airflow, leaks near equipment, unusual odors, and visible damage.
Bathroom and kitchen ventilation also matters. Poor ventilation can lead to moisture buildup and tenant complaints.
Use qualified HVAC technicians for system testing, repair, and maintenance beyond basic visual observations.
16. Smoke Detectors, CO Detectors, and Safety Devices
Check smoke detectors, carbon monoxide detectors, fire extinguishers if required, and other safety devices included in the inspection scope.
Requirements vary by state, municipality, property type, and program. Follow local rules and client instructions.
HUD’s NSPIRE approach places strong emphasis on health and safety conditions in housing inspections, including items within units and interior spaces.
Document missing, expired, damaged, or non-working devices. If the work order requires testing, follow the approved process.
17. Appliances and Fixtures
Inspect owner-provided appliances and fixtures when included in the scope. This may include refrigerators, stoves, ovens, microwaves, dishwashers, washers, dryers, ceiling fans, light fixtures, and range hoods.
Document whether each item is present, missing, damaged, dirty, or visibly unsafe.
For dryers, watch for lint buildup, disconnected vents, or damaged exhaust lines. Dryer vent issues can create fire risks.
Do not move heavy appliances unless authorized and safe.
18. Signs of Water Damage, Mold-Like Growth, and Pests
Interior inspections should look closely for water damage and pest indicators.
Watch for ceiling stains, wall stains, swollen trim, soft flooring, musty odors, peeling paint, standing water, and mold-like growth.
Pest signs may include droppings, nests, gnaw marks, odors, dead insects, or damaged materials.
Do not identify mold species or pest types unless you are qualified. Use language like “mold-like growth” or “possible pest activity” and recommend specialist evaluation.
What Is Not Included in a Basic Interior Inspection?
A basic interior inspection is usually visual. It does not cover everything inside the home.
It may not include code compliance, concealed defects, environmental testing, lead paint, asbestos, radon, mold testing, pest identification, engineering analysis, or full system diagnostics.
InterNACHI’s general exclusions state that inspectors are not required to determine code compliance, causes of conditions, concealed defects, service life expectancy, repair costs, or environmental hazards such as mold, radon, lead paint, asbestos, and other substances.
This is why clear reporting matters. Document the visible issue, then recommend further evaluation when needed.
Interior Inspection Photo Standards
Good photos help clients understand the property without being there.
Use a consistent photo process:
- Take a wide photo of each room.
- Take close-up photos of damage.
- Show the location of each issue.
- Photograph safety hazards clearly.
- Capture missing or damaged items.
- Include access limitation photos when possible.
- Take utility and system photos if required.
- Avoid blurry, dark, or cropped photos.
For example, if a bathroom vanity has water damage, take one photo of the whole bathroom and one close-up of the damaged cabinet. This shows both context and detail.
If you cannot access a room, attic, basement, or utility area, document the reason.
How to Report Interior Damage
A good report should be clear, factual, and easy to act on.
A weak note says:
“Bad wall damage.”
A stronger note says:
“Two holes visible in living room drywall near front window. Largest hole is approximately 6 inches wide. Recommend drywall repair and paint.”
Include the room, location, visible condition, approximate size, photos, urgency, and recommended next step.
Avoid guessing. If the cause is not confirmed, say so.
For example:
“Water stain visible on hallway ceiling. Source not confirmed during inspection. Recommend plumbing or roof leak evaluation.”
This type of reporting helps property managers, owners, and clients make repair decisions faster.
When to Escalate to a Licensed Specialist
Some interior issues need a trained professional.
Recommend a licensed electrician for exposed wiring, scorch marks, panel concerns, repeated breaker trips, damaged electrical components, or unsafe outlets.
Recommend a licensed plumber for active leaks, sewer backups, water heater issues, broken supply lines, or repeated drainage problems.
Use an HVAC technician for heating or cooling failures, damaged equipment, poor airflow, or system performance concerns.
Recommend a structural engineer or qualified building professional for sagging floors, large cracks, bowing walls, major settlement signs, or unsafe structural conditions.
Recommend a mold, pest, or environmental specialist when the issue is outside your inspection scope.
If a condition appears unsafe, stop and report it. Do not continue into areas that could put you at risk.
Interior Inspection Checklist Summary
Use this checklist for residential interior inspections:
- Access approval and safety check
- Entry and general condition photos
- Occupancy or vacancy indicators
- Room-by-room wide photos
- Walls, ceilings, floors, and trim
- Doors, windows, locks, and hardware
- Stairs, railings, and handrails
- Kitchen fixtures, cabinets, appliances, and plumbing
- Bathroom fixtures, ventilation, flooring, and moisture signs
- Bedrooms, living areas, closets, and common spaces
- Basement, attic, crawl space, and utility areas if accessible
- Visible plumbing concerns
- Visible electrical concerns
- HVAC and ventilation observations
- Smoke and carbon monoxide detectors
- Appliances and fixtures
- Water damage, mold-like growth, and pest signs
- Access limitations
- Recommended repairs or specialist evaluations
Interior Inspection FAQ
What does an interior inspection include?
An interior inspection usually includes walls, ceilings, floors, stairs, doors, windows, kitchens, bathrooms, bedrooms, living areas, basements, attics, utility spaces, visible systems, safety devices, and signs of damage.
Is an interior inspection the same as a full home inspection?
No. An interior inspection focuses on inside areas of the property. A full home inspection usually includes interior, exterior, roof, structure, plumbing, electrical, HVAC, insulation, ventilation, and other systems within the inspection scope.
Should field service providers test electrical systems?
Only within their training, authorization, and local rules. Field service providers should not open electrical panels, touch exposed wiring, or perform repairs unless licensed and authorized.
What should be photographed during an interior inspection?
Photograph each room, visible damage, safety hazards, missing items, appliances, utility areas, systems, and access limitations. Use wide photos for context and close-ups for detail.
What interior issues need urgent attention?
Urgent issues include active leaks, exposed wiring, missing smoke detectors, broken locks, unsafe stairs, severe water damage, mold-like growth, structural concerns, sewer backup, and non-working heat in cold conditions.
Can an interior inspection identify mold?
A visual inspection can document mold-like growth, stains, or moisture concerns. It should not identify mold type or severity unless performed by a qualified specialist.
An interior inspection helps protect residential properties from hidden damage, safety issues, and avoidable repairs. It gives property managers, owners, and field service teams the information they need to act quickly.
Keep the process simple and consistent. Inspect each room in the same order, take clear photos, document visible facts, and escalate technical issues to licensed specialists.
A strong interior inspection report should make the next step clear. It should show what was inspected, what was found, and what needs attention.