A rental property inspection checklist helps you keep properties safe, functional, and ready for tenants. It also gives you a clear record of property condition before small issues turn into expensive repairs.
For property managers, landlords, and field service teams, inspections are more than a walk-through. They help document damage, plan maintenance, support owner reporting, and reduce disputes during move-in, move-out, and routine visits.
This guide gives you a practical rental property inspection checklist you can use for interior, exterior, seasonal, and system checks. You can also adapt it for single-family rentals, small multifamily properties, and larger managed portfolios.
What Is a Rental Property Inspection Checklist?
A rental property inspection checklist is a written list of items to review during a property inspection. It helps you check the condition of each area in a consistent way.
A good checklist usually covers the exterior, interior rooms, plumbing, electrical systems, HVAC, appliances, safety devices, and signs of damage. It should also leave room for notes, photos, repair needs, and follow-up actions.
The goal is simple. You want to know what condition the property is in, what needs attention, and what should be documented.
A checklist does not replace a licensed home inspection or specialist evaluation. If you find structural concerns, electrical hazards, major roof issues, plumbing failures, or HVAC problems, bring in the right professional.
What a Rental Property Inspection Should Cover
A rental property inspection should give you a clear picture of the property’s condition. It should also help you spot repair needs before they become larger problems.
At a minimum, your checklist should cover the exterior, interior, major systems, safety items, and visible structural concerns.
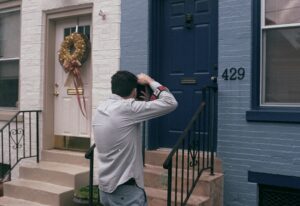
Start with the outside of the property. Check the roof from the ground, gutters, siding, foundation, drainage, windows, doors, stairs, walkways, fencing, and landscaping.
Inside the property, check walls, ceilings, floors, doors, windows, kitchens, bathrooms, bedrooms, living areas, basements, attics, and utility spaces.
You should also review visible plumbing, electrical, HVAC, water heater, and appliance conditions. These checks do not replace professional inspections, but they help you know when to bring in a licensed specialist.
Finally, document safety items. Smoke detectors, carbon monoxide detectors, locks, handrails, exterior lighting, and trip hazards should be part of every rental inspection.
Why Rental Property Inspections Matter
Rental inspections help protect the property and the people living in it. They also make maintenance easier to manage.
Without regular inspections, small problems can stay hidden. A minor leak can turn into floor damage. A loose gutter can lead to water intrusion. A missing smoke detector can create a serious safety issue.
Routine inspections also help you separate normal wear and tear from tenant-caused damage. That can be useful during move-out, security deposit reviews, and owner communication.
For property managers, a consistent inspection process creates better records. Photos, notes, and timestamps can help when you need to explain repair decisions, track vendor work, or report property condition to owners.
How Inspection Findings Affect Property Value
Inspection findings can affect the value of a rental property over time. Small issues may not seem urgent at first, but they can lower property condition if they stay unresolved.
For example, a minor roof leak can lead to ceiling damage, mold concerns, and higher repair costs. A loose handrail can create a safety issue. A slow plumbing leak can damage flooring, cabinets, and walls.
Regular inspections help you protect the asset, not just respond to tenant complaints. They give property owners a clearer view of what needs repair, what should be budgeted, and what can wait.
Good inspection records can also support future sale, refinance, insurance, or owner reporting needs. Photos, notes, and repair history show how the property has been maintained.
For property managers, this is where inspections create long-term value. They help you make better maintenance decisions before the property condition declines.
When Should You Inspect a Rental Property?
Inspection timing depends on your lease terms, local laws, property type, and management process. Rules can vary by state and municipality, so always check notice requirements before entering a tenant-occupied unit.
Most rental properties benefit from several types of inspections.
Move-In Inspection
A move-in inspection documents the property before the tenant takes possession. This protects both sides.
You should record the condition of walls, floors, appliances, fixtures, doors, windows, safety devices, and outdoor areas. Take photos and have the tenant review the condition report when possible.
This creates a baseline for future inspections.
Routine Inspection
Routine inspections are usually done during the lease term. Many managers schedule them quarterly, semi-annually, or annually.
These inspections help you catch maintenance issues early. They can also show whether the tenant is following lease terms related to property care.
Keep the visit focused and professional. Look for safety issues, water damage, unauthorized alterations, pest signs, and repair needs.
Move-Out Inspection
A move-out inspection compares the property’s current condition with the move-in record.
This helps you identify damage beyond normal wear and tear. It also helps you create a repair plan before the next tenant moves in.
Photos are especially useful here. They can reduce confusion and support your final condition report.
Seasonal Inspection
Seasonal checks help prepare the property for changing weather. These inspections are useful before winter, after storms, and before warmer months.
For example, you may check heating systems before cold weather, air conditioning before summer, and gutters after heavy leaf fall.
Seasonal inspections are especially helpful for portfolios in regions with snow, storms, extreme heat, or heavy rainfall.
Exterior Rental Property Inspection Checklist
The exterior is the first place to look for damage, safety risks, and deferred maintenance. Exterior issues can also lead to interior problems if they are ignored.
Roof and Gutters
Check the roof from the ground when possible. Look for missing shingles, damaged flashing, sagging areas, debris, or visible storm damage.
Inspect gutters and downspouts for clogs, loose sections, rust, and poor drainage. Water should move away from the structure.
If you see signs of roof damage, schedule a qualified roofing professional. Property staff should not climb roofs unless they are trained, insured, and allowed to do so.
Siding and Exterior Walls
Look for cracks, holes, loose siding, warping, stains, mold, rot, or impact damage. These issues can affect both appearance and weather protection.
Pay close attention to areas near windows, doors, utility penetrations, and ground contact. Gaps and damage in these areas can allow water or pests inside.
Document any damage with photos and notes.
Foundation and Drainage
Walk around the property and look for cracks, shifting, standing water, or soil sloping toward the building.
Poor drainage can cause basement leaks, foundation stress, and moisture problems. Check downspout extensions, grading, and low spots near the structure.
If you see large cracks, movement, or repeated water intrusion, escalate the issue to a qualified professional.
Windows and Doors
Inspect windows and doors for cracks, broken glass, damaged screens, loose locks, gaps, and signs of water intrusion.
Check that exterior doors close and lock properly. For rental properties, secure entry points are a key part of tenant safety and property protection.
Look at caulking and weatherstripping as well. Worn seals can increase drafts, moisture, and energy loss.
Walkways, Driveways, and Stairs
Look for trip hazards, cracks, potholes, loose railings, uneven steps, and damaged handrails.
These items matter because they can create safety and liability concerns. Fix hazards quickly and document the repair.
For multifamily properties, inspect common walkways, parking areas, and entrances on a regular schedule.
Landscaping and Trees
Check for overgrown shrubs, tree branches touching the property, dead branches, and blocked walkways.
Landscaping should not trap moisture against the structure. It should also allow clear access to doors, windows, meters, and utility areas.
Simple landscaping maintenance can prevent pests, roof damage, and drainage problems.
Interior Rental Property Inspection Checklist
Interior inspections help you identify damage, maintenance needs, and safety issues inside the unit.
Walls, Ceilings, and Floors
Check walls and ceilings for cracks, stains, holes, peeling paint, and signs of leaks.
Inspect floors for soft spots, stains, broken tiles, damaged carpet, scratched hardwood, or lifting vinyl. Flooring damage should be photographed and described clearly.
Water stains need extra attention. They may point to plumbing leaks, roof leaks, HVAC condensation, or past flooding.
Doors, Locks, and Windows
Test interior and exterior doors. Make sure they open, close, latch, and lock properly.
Check windows for smooth operation, broken locks, cracked glass, damaged screens, and condensation between panes.
For tenant-occupied units, working doors and windows also affect safety, ventilation, and comfort.
Kitchen
Inspect the sink, faucet, garbage disposal, cabinets, countertops, backsplash, appliances, and flooring.
Look for leaks under the sink, loose cabinet doors, damaged counters, pest signs, and appliance issues. Run water long enough to check drainage and leaks.
Check that the stove, refrigerator, dishwasher, and range hood are clean and functional if they are included with the rental.
Bathrooms
Bathrooms need close attention because moisture issues can spread quickly.
Check toilets, sinks, tubs, showers, faucets, drains, caulk, grout, exhaust fans, flooring, and walls. Look for leaks, soft flooring, mold, mildew, and slow drainage.
Test the exhaust fan if one is present. Poor ventilation can lead to recurring moisture complaints.
Bedrooms and Living Areas
Look for wall damage, flooring issues, broken blinds, missing screens, stains, odors, and signs of pests.
Check that windows open and close properly. Also inspect closet doors, shelving, light fixtures, and outlets for visible damage.
Keep notes objective. Write what you see, not assumptions about how damage happened.
Basement, Attic, and Utility Areas
Check these areas for leaks, pests, insulation problems, exposed wiring, damaged ducts, or stored items blocking access.
Look for moisture, odors, staining, and visible structural concerns. Utility areas should be accessible and clear enough for service work.
If you see structural movement, unsafe wiring, or major water damage, escalate the issue.
Property Systems Inspection Checklist
Property systems require a careful approach. Some items can be visually checked by property staff, but technical work should go to licensed professionals.
Plumbing
Check faucets, toilets, visible pipes, water heaters, shutoff valves, drains, and areas under sinks.
Look for leaks, corrosion, low water pressure, slow drains, running toilets, or water stains. These issues can become costly if ignored.
For major leaks, sewer issues, water heater problems, or pipe repairs, use a licensed plumber.
Electrical
Check for visible issues such as broken outlets, damaged switches, missing cover plates, flickering lights, warm outlets, or scorch marks.
Test GFCI outlets where appropriate, especially in kitchens, bathrooms, garages, laundry areas, and exterior locations.
Electrical work can be dangerous. Use a licensed electrician for panel work, wiring problems, breaker issues, and technical testing.
HVAC
Check whether heating and cooling systems turn on, respond to the thermostat, and produce expected airflow.
Look at air filters, vents, visible ducts, thermostat condition, and signs of leaks around HVAC equipment.
Schedule professional service for repairs, seasonal tune-ups, and system performance issues.
Water Heater
Inspect the water heater area for leaks, rust, corrosion, unusual noises, or water pooling nearby.
Check the age of the unit if the label is visible. Older water heaters may need closer monitoring.
Use a qualified plumber or technician for repairs, replacement, or safety concerns.
Appliances
Inspect all owner-provided appliances. Confirm that they are clean, functional, and free of obvious damage.
Check the refrigerator, stove, oven, microwave, dishwasher, washer, and dryer if included.
For dryers, lint buildup should be taken seriously. Blocked vents can create a fire hazard.
Safety Inspection Checklist
Safety checks should be part of every rental inspection.
Test smoke detectors and carbon monoxide detectors according to local requirements and manufacturer guidance. Replace missing, expired, or non-working devices.
Check handrails, stairways, exterior lighting, door locks, window locks, and trip hazards. For multifamily properties, inspect common areas, shared entries, and emergency exits where applicable.
Make sure fire extinguishers, emergency lights, or other required safety items are present if local rules require them.
Keep safety documentation organized. Inspection dates, replacement records, and photos can help show that you follow a consistent process.
Common Issues Found During Rental Property Inspections
Rental inspections often reveal the same types of problems.
Common findings include water leaks, damaged flooring, missing smoke detectors, pest signs, clogged gutters, broken locks, HVAC filter neglect, damaged walls, leaking toilets, and exterior drainage issues.
Some problems are normal wear and tear. Others may require tenant follow-up, owner approval, or vendor repair.
The key is to document each issue clearly. Note the location, condition, severity, and recommended next step.
What to Document During a Rental Inspection
Good documentation makes your inspection process much stronger.
Record the property address, unit number, inspection date, inspector name, tenant presence, areas inspected, and access limitations.
Take clear photos of each issue. Include wide shots for context and close-up photos for detail.
For each repair need, include a short description, urgency level, and recommended action. If a vendor is needed, note the trade required.
Store inspection records in a place your team can access later. Many managers use property management software, maintenance platforms, shared drives, or digital inspection tools.
What to Do After a Rental Property Inspection
A rental inspection should lead to clear next steps. After the visit, review the notes, photos, and repair items before closing the report.
Start by separating urgent issues from routine maintenance. Safety hazards, active leaks, electrical concerns, broken locks, missing smoke detectors, and HVAC failures should move to the top of the list.
Next, assign each repair to the right person. Some items may go to internal maintenance staff. Others should go to licensed electricians, plumbers, HVAC technicians, roofers, or other specialists.
If owner approval is needed, send a clear summary with photos, estimated urgency, and recommended action. This helps owners understand why the repair matters.
Track each repair until it is complete. Once the work is done, save invoices, completion photos, vendor notes, and any follow-up inspection details.
What a Routine Rental Inspection May Not Cover
A routine rental inspection is useful, but it has limits. It is usually a visual condition check, not a full technical inspection.
Your checklist may not cover environmental testing, such as radon, asbestos, lead paint, or indoor air quality. It may also not include mold testing, pest inspection, pool inspection, or detailed structural engineering review.
Routine inspections also do not replace full electrical, plumbing, HVAC, roof, or foundation evaluations. If you see warning signs, bring in a qualified specialist.
This distinction matters for documentation. Your report should describe visible conditions and recommend further evaluation when needed.
For example, you can report a ceiling stain and recommend leak evaluation. You should avoid stating the cause unless it has been confirmed.
Rental Property Inspection Checklist Template
You can use this structure to create your own printable or digital checklist.
Property Information
Include property address, unit number, tenant name, inspection date, inspector name, inspection type, and weather conditions if relevant.
Exterior
Check roof, gutters, siding, foundation, windows, doors, stairs, walkways, driveway, landscaping, fencing, exterior lighting, and drainage.
Interior
Check walls, ceilings, floors, doors, windows, closets, stairs, kitchen, bathrooms, bedrooms, living areas, basement, attic, and utility spaces.
Systems
Check visible plumbing, electrical, HVAC, water heater, appliances, vents, and drainage.
Safety
Check smoke detectors, CO detectors, locks, handrails, lighting, trip hazards, fire extinguishers if required, and emergency access where applicable.
Documentation
Record photos, notes, repair needs, vendor recommendations, tenant comments, and follow-up deadlines.
Tips for Better Rental Property Inspections
Give proper notice before entering an occupied rental. Local laws and lease terms can affect how much notice you must provide.
Use the same checklist each time. Consistency helps you compare property condition over time.
Take photos during every inspection. Photos create a clearer record than notes alone.
Do not ignore small issues. A slow leak, loose railing, or cracked caulk can become a larger repair.
Follow up after the inspection. A checklist only helps if the repair items are assigned, tracked, and completed.
How Often Should Rental Properties Be Inspected?
There is no single schedule that works for every property. The right frequency depends on the property type, location, tenant situation, lease terms, and local rules.
Many managers inspect at move-in, move-out, and at least once during the lease term. Some also use quarterly or semi-annual inspections for higher-risk properties.
Seasonal checks can also help. Roofs, gutters, HVAC, exterior drainage, and weatherproofing often need different attention throughout the year.
For larger portfolios, create a recurring inspection calendar. This helps you avoid missed visits and keeps maintenance more predictable.
How Long Does a Rental Property Inspection Take?
The time needed for a rental property inspection depends on the property size, inspection type, access, and condition.
A quick routine inspection may take less time if the property is in good condition. A move-in or move-out inspection can take longer because you need more photos and detailed room-by-room notes.
Larger homes, multifamily properties, and properties with visible damage also take more time. If you need to inspect exterior areas, utility spaces, appliances, and safety items, plan enough time to avoid rushing.
Photo documentation and reporting also add time after the visit. A good inspection includes both the walkthrough and the follow-up work needed to organize findings.
For property managers, it helps to use the same checklist each time. A consistent process makes inspections faster and easier to compare across properties.
Rental Property Inspection FAQ
What should be included in a rental property inspection checklist?
A rental property inspection checklist should include exterior areas, interior rooms, plumbing, electrical items, HVAC, appliances, safety devices, and documentation fields. It should also include notes, photos, and repair follow-up.
Can landlords inspect a rental property while tenants live there?
In many cases, yes, but proper notice is usually required. Notice rules vary by state, municipality, and lease terms. Always follow local requirements before entering an occupied unit.
How often should a landlord inspect a rental property?
Many landlords and property managers inspect at move-in, during the lease, and at move-out. Some also inspect quarterly, semi-annually, or seasonally based on property needs and local rules.
What is the difference between a rental inspection and a home inspection?
A rental inspection checks property condition during ownership or tenancy. A home inspection is usually part of a purchase or sale and is often completed by a licensed home inspector. A rental checklist does not replace a professional home inspection.
Should tenants receive a copy of the inspection checklist?
Sharing the checklist can help reduce confusion. It gives tenants a clear record of condition, repair items, and expectations. Keep copies for your internal records as well.
What should property managers do after an inspection?
Review the findings, organize photos, assign repairs, notify owners when needed, and track work until completion. The inspection should lead to action, not just paperwork.
A rental property inspection checklist helps you protect the property, document condition, and plan repairs before problems grow.
Start with a simple checklist that covers the exterior, interior, systems, safety items, and documentation. Then adapt it to your property type, local rules, and management process.
For property managers and field teams, the real value comes from consistency. Inspect regularly, document clearly, assign repairs quickly, and keep records organized across every property.