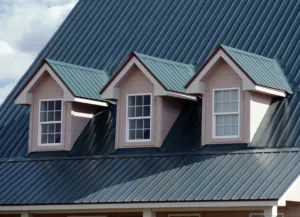
Roof flashing is an important component of any roofing system. It helps to prevent water from seeping through the roof and causing damage to the interior of the building. However, over time, roof flashing can become damaged and need repairs. In this blog post, we will discuss how to repair damages to roof dormers and valleys.
Tools and Materials Required for Roof Flashing Repairs
Before starting any roofing repair work, it is important to ensure you have all the necessary tools and materials. Here is a list of the items required for fixing damaged roof flashing:
- Ladder
- Tape measure
- Work gloves
- Pry bar
- Scrap wood
- Hammer
- Replacement aluminum flashing (pre-bent is recommended)
- Galvanized roofing nails
- Waterproof roof sealant
- Wide flat trial and a thinner mortar trial
- Broom
- Utility knife
- Mortar mix
- Black polyurethane roof and flashing sealant
- Flat utility chisel
- Wire brush
- Scraper
- Tin snips
- Clean rags
Identifying and Stopping Active Roof Leaks
If you find an active roof leak when you first arrive at a property, it is important to take immediate action. An active leak is any condition where the roof does not protect the interior of the dwelling by way of water intrusion, potential water intrusion, or missing roof components that jeopardize the functionality of the roof.
The first step when an active roof leak is found is to identify the source. Start by cycling through the common sources and look for damaged, curled, or missing shingles. Be sure to check the entire roof system, including around every chimney or event, and look for breaks in the flashing or caulking, or for gaps in the lines of roof sealant. Don’t forget to also check the gutters. Once the source is identified, the objective is to stop the leak in the most direct fashion possible.
Repairing Damaged Step Flashing
Check your work order for the allocated allowable amount to repair. Almost all flashing repairs can be done for the established allowable. If you come across a roof line that runs into a vertical wall such as a dormer or when an attached garage runs into a two-story home, step flashing will be used. Should the step flashing need to be replaced? Follow these steps:
Step 1: Peel back one row of shingles to expose the bottom plate of the step flashing. Cut away the old with a razor knife and then pull all nails out with a claw hammer. If the top plate of the step flashing is underneath siding, you will need to remove the section of siding and then remove the caulk and nails the same way you did on the bottom plate. Peel off the old piece of step flashing and discard.
Step 2: Measure your replacement piece of step flashing and cut it with your tin snips. Step flashing can either be bought or made from a 6-inch wide piece of flat sheet metal by bending the metal 3 inches at a 90-degree angle.
Step 3: Install the cut piece in the same location as the old piece of step flashing. Nail down the bottom plate with galvanized nails and seal along the edges of the flashing with caulk. Also, cover the nails and run a line along the top plate with caulk. Do not nail the top plate. Replace the shingles over the bottom plate of the step flashing, place a dab of roof sealant under each shingle so they do not peel back up. Lastly, replace the siding over the top plate of the step flashing.
Replacing Damaged Roof Flashing
If the damaged flashing cannot be repaired and must be completely replaced, follow these steps:
Step 1: Remove the old flashing. Use a pry bar and hammer to carefully remove the damaged flashing from the roof.
Step 2: Cut the new flashing to size. Measure the length of the damaged flashing and cut a new piece of flashing to match.
Step 3: Install the new flashing. Slide the new flashing into place, making sure it is properly aligned with the surrounding shingles. Secure it in place with roofing nails and cover the nail holes with roofing sealant.
Step 4: Seal the edges. Apply roofing sealant along the edges of the flashing to prevent water from seeping underneath.
Step 5: Replace the shingles. Carefully replace the shingles that were removed, making sure they are properly aligned and nailed down securely.
Step 6: Inspect the repair. Once the repair is complete, inspect the area to ensure that the flashing is properly installed and sealed, and that there are no visible signs of damage or leaks.
Fixing damaged roof flashing is an essential part of maintaining a watertight roof. Whether you are repairing or replacing damaged flashing, it is important to use the right tools and materials and follow the proper procedures to ensure a long-lasting repair. By following the steps outlined in this article, you can repair or replace damaged roof flashing and prevent further damage to your roof and home. Remember, if you are unsure about how to make a repair or if the damage is extensive, it is always best to consult with a professional roofing contractor.