Documenting the condition of a property is an important task for any property management company or real estate professional. In this post, we’ll provide the best practices for accessing and documenting a property’s condition using photos.
- Show all aspects of the interior and exterior
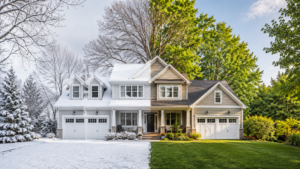
When documenting a property’s condition, it’s important to show all aspects of the interior and exterior, including each side of the house, garages, driveways, yards, roof, attic, and basement. This must be done every time you visit the property, regardless of the type of work order.
- Take clear photos
Make sure to take clear photos that aren’t blurry. If you’re having trouble taking clear photos due to insufficient natural light, use a flashlight to help. Always check photos for clarity before uploading them to the system.
- Show all conditions at the property
Make sure to take photos that show all conditions at the property, whether it’s damaged or not. This will help to provide a comprehensive picture of the property’s condition.
- Properly label and upload photos to the MS
It’s important to properly label and upload all photos to the MS. This is because the labels provide contact information for everyone who reviews the order at United Field Services.
Exterior Photos
Start by taking exterior photos of the property. Make sure to take photos of all sides of the house, windows, and doors, as well as any outbuildings like sheds and garages. It’s best practice to take photos from different angles, including front-to-back and back-to-front.
Take photos of the roof, making sure to provide photos of any protrusions and examine chimneys and other attached structures for potential damage. Be sure to take photos of chimneys, vent stacks, flashing, satellite dish awnings, and gutters.
If there is any damage to the exterior, take both zoomed-out and close-up photos to clearly show the damage. If there are any outbuildings, make sure to take photos of each corner of the structure and its windows, as well as the interior of the building.
Interior Photos
Start by documenting the interior of the roof and attic. Take photos of the rafters, joists, underside of the sheathing, and inside of the soffit and fascia area. If there is an active roof leak, take close-up photos of the damaged area and any evidence that the leak is active.
Take photos of the interior living areas, including finished and unfinished basement areas. Take at least six photos of each room, including photos of all flooring, walls, and ceilings. For best practice, take photos from each corner of the room to capture the entire condition.
Take photos of all mechanical items located in the basement, such as the water tank or furnace. Also, take photos of all plumbing lines, whether there is damage or not, to provide a comprehensive picture of the condition of the visible plumbing lines.
If the property is post-sale, you’ll need to have documentation photos relevant to the debris removal process. Take photos of the debris according to placard parameters, making sure that the placards are present and show accurate totals of debris specific to each room. Progression load photos of the truck or trailer should also be taken at 1/4, 1/2, 3/4, and full capacity.
In conclusion, following these best practices for documenting a property’s condition with photos will help ensure that you have a comprehensive picture of the property’s condition and will help with bid approvals and verifying if damages are.