Repairing damaged chimney flashing is a crucial skill in our industry. Fear not, as this expertly crafted article is here to guide you through each and every step of the process. Our comprehensive guide will equip you with the know-how to quickly identify and repair flashing issues, using only the best tools and materials in the business. Don’t miss out on the opportunity to enhance your reputation as a reliable and skilled contractor. Read on to discover how to protect your clients’ properties from costly water damage and ensure their satisfaction.
Step 1: Identify the Source of the Leak
Before starting any repair work, it is crucial to identify the source of the leak. This can be done by checking for active roof leaks and cycling through common sources, such as damaged or missing shingles, breaks in flashing or caulking, or gaps in roof sealant. It is also important to check gutters for any blockages or damage that may be causing water to back up and leak into the property.
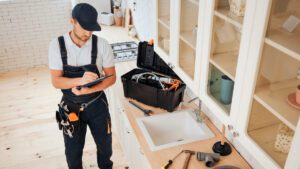
Step 2: Gather the Necessary Tools and Materials
To repair damaged chimney flashing, the following tools and materials will be required: a ladder, tape measure, work gloves, pry bar, scrap wood, hammer, replacement aluminum flashing, roofing nails, waterproof roof sealant, a wide flat trial and a thinner mortar trial, broom, utility knife, mortar mix, black polyurethane roof and flashing sealant, flat utility chisel, wire brush, scraper, tin snips, and clean rags.
Step 3: Inspect and Secure Flashing
Inspect the damaged metal flashing around the chimney or dormer and remove any loose dirt or debris from the area. Hammer down any raised nail heads so that they are flat, and add a few more roofing nails to secure the flashing. Apply roof sealant with a trial or putty knife to areas that look worn or cracked. Cover any exposed nail heads with roof sealant as well.
Step 4: Re-Secure Flashing (if necessary)
Sometimes, the flashing around the chimney may need to be re-secured. Chimney flashing is installed in two parts: the base which covers the bottom of the chimney and extends onto the roof, and the cap which is fitted between the mortar joint of the chimney bricks. If the mortar holding the cap flashing is crumbling or if the flashing has pulled loose, the flashing needs to be re-secured.
To re-secure, the flashing, pull the lip of the cap flashing out of the mortar joint only as far as it comes easily. Do not yank the entire flashing out or pull it completely away from the chimney. Clean out the old mortar with a hammer and chisel, then use a wire brush on the joint to clean out stone dust and debris. Wet the joint with a paintbrush dipped in water and fill the joint firmly with prepared mortar mix. Press the lip and the flashing firmly back into the mortar. Once the joint is completely cured, caulk around it and over the lip of the cap flashing. The joint at the base of the chimney must also be sealed. If gaps are visible at the roof line, caulk around the base of the chimney with roof sealant in a caulking gun.
Fixing damaged chimney flashing is a crucial aspect of property preservation. With the right tools and materials and by following the steps outlined above, property preservation contractors can successfully repair damaged flashing and prevent further damage to property. Remember to always identify the source of any active roof leaks and take action immediately.